The most prominent feature of PodSpace is the ability to build continuous delivery pipelines. A continuous delivery pipeline is the ultimate tool which enables you to accelerate the application development process to the new standards of the cloud era.
A delivery pipeline basically means an automated application delivery process which does all the building, testing and deployment steps required to roll out a new version of your application into production. This way you could literally have multiple production releases every day!
|
It is important to note that in order to achieve this, you need more than just a set of tools: first of all, you (and your team) have to embrace the ideas of cloud application development and build a strong culture around DevOps practices. The choice of tooling should come after you understand the challenges that you have to resolve. But if done right, the benefits are overwhelming: increased software quality, increased agility and cost savings. |
In the following example, we will set up three separate application environments for development, testing and production, and we will use a pipeline build to orchestrate the application delivery process over those three environments.
Check out the following video to see a demonstration of what will follow:
This tutorial contains all the description of how to recreate what you have seen in this video in your own environment on PodSpace.
Setting up the environments
Most of these steps can be done both using the psc command line client for PodSpace
and on the web-based admin console. We will be using the command line to show you
these steps. If you are familiar with PodSpace, you could try to recreate the same things
from the web console too.
Creating the projects
We have to create the three application environments mentioned apove: development, testing and production. These environment will sit in their own separate projects, so we have to create three projects.
You should make up a unique name for these three projects, we recommend you to name the projects based on your email address, so if your email is bill@example.com, name your projects bill-test, bill-dev, and bill-prod.
Throughout the tutorial, we will be using myapp-dev, myapp-test and myapp-prod, but be aware that you will have to change these to the project names that you are using.
Create the projects by typing the following commands:
psc new-project myapp-dev
psc new-project myapp-test
psc new-project myapp-prod
| Projects reside in a global namespace, so you might get a project already exist error when creating a project with a name which already exists. If this happens, just replace the myapp part in the project name to something else and continue using those names. |
Setting up permissions
The pipeline will be controlled by a Jenkins instance running in the myapp-dev project, which uses the service account named jenkins to access the PodSpace environment.
The service account works like a normal user account that you would also use to access PodSpace: it has specific permissions which control exactly what the user has access to. The difference is that the service account does not have to log in and authenticate: the service account resides within a project (you could create one yourself), and can be assigned to specific applications in the deployment configurations.
We will have to add permissions for the jenkins service account under the myapp-dev project to control the deployments in the myapp-test and myapp-prod projects:
psc policy add-role-to-user edit system:serviceaccount:myapp-dev:jenkins -n myapp-test
psc policy add-role-to-user edit system:serviceaccount:myapp-dev:jenkins -n myapp-prod
The application will be compiled and built in the myapp-dev project: it contains the BuildConfig which controls the build and the ImageStream where the builded images reside. We will be deploying the images from this image stream in all three projects, so we have to give the other two projects rights to access the images under the myapp-dev project.
In order to do this, we have to give system:image-puller permissions in the myapp-dev project for service accounts under the project myapp-test and myapp-prod.
psc policy add-role-to-group system:image-puller system:serviceaccounts:myapp-test -n myapp-dev
psc policy add-role-to-group system:image-puller system:serviceaccounts:myapp-prod -n myapp-dev
Creating the pipeline
Check out the Git repository at github.com/podspace/pipeline-demo. The repository contains the source code of our _kitchensink application that we will build and test with the pipeline, plus a number of example configurations inside the tutorial directory.
We will have to create the pipeline definition next. The pipeline definition that we will be using resides in the advanced-pipeline-buildconfig.yaml file under the tutorial directory.
Important: the pipeline definition contains the name of the projects that we are using. You will have to open the file with a text editor and change the all occurences of myapp-dev, myapp-test and myapp-prod to the names of your projects.
So clone the repository, edit the file and then create the pipeline with the following command:
psc create -f tutorial/advanced-pipeline-buildconfig.yaml -n myapp-dev
At this point, a Jenkins instance gets automatically deployed in the myapp-dev project.
You should check out the details of its deployment configuration, and most importantly,
check the password of the admin user defined in the JENKINS_PASSWORD environment variable.
Should you have to log in into Jenkins (it is not necessary needed by the way), you can do
it using that password. To see the password, type:
psc describe dc jenkins
|
The pipeline definition that you see in the advanced-pipeline-buildconfig.yaml file contains the definition of all the steps of our pipeline. It contains the definition of a Jenkinsfile, which Jenkins will use to work out exactly what to do in each step of the pipeline. It will be too lengthy to go into all the details of defining pipelines in Jenkins, so it is not the scope of this tutorial to explain it, however, we’ll give you some pointers where to look if you want to know more. First of all, the pipeline itself is controlled by the Jenkins Pipeline plugin, so you should check out the Jenkins pipeline plugin web page for more details on how it works. And secondly, there is another Jenkins plugin that is used through the build: the
Openshift pipeline plugin,
which gives us the ability to control builds and deployments inside PodSpace with
simple commands such as |
Deploying the environments
Great! Now are pipeline is ready to build and deploy our application… well, almost. The problem is, we don’t have the application deployed yet.
So now we have to create the BuildConfig inside the myapp-dev project which will build the application from source, and the DeploymentConfigs in all three project which will handle the deployment of the application.
The pipeline will trigger these BuildConfigs and DeploymentConfigs at various stages to do the building and deploying of the application.
As mentioned earlier, we will be using the application named kitchensink as a demo app, so let’s deploy it in the myapp-dev project as an S2I (source-to-image) application:
psc new-app https://github.com/podspace/pipeline-demo --name=myapp --context-dir=kitchensink --image-stream="podspace/wildfly:10.1" -n myapp-dev
Next, we will have to deploy the application in the myapp-test and myapp-prod projects, but in a special way: we want those deployments to deploy the images in the myapp-dev project that are created during the S2I build that we have just defined.
We also want to have control over which version of the application is getting deployed in which environment. We will do this by deploying different tags of the image streams: in the myapp-test project we will deploy the images tagged with latest-test:
psc new-app myapp-dev/myapp:latest-test --name=myapp --allow-missing-imagestream-tags -n myapp-test
And finally, in the myapp-prod project we will deploy the images tagged with latest-prod:
psc new-app myapp-dev/myapp:latest-prod --name=myapp --allow-missing-imagestream-tags -n myapp-prod
|
So how will this all work? When we (or actually Jenkins, which controls the pipeline process) start the build in the myapp-dev project, it will eventually push a new image into the image stream named myapp, tagged with the latest tag. Now, if we want that image to be deployed in the myapp-test project, we will have to tag that image with the latest-test tag, and then the deployment config that we have created in the myapp-test project will automatically start a new deployment. And basically this is what’s being done in the deployment stages of the pipeline: if you check
the deploy-on-test stage for example in the pipeline definition, you will see an |
Accessing the application
We’re almost ready now, there is just one more thing we have to do: the deployments we have created in our myapp-test and myapp-prod projects does not have any Service and Route objects associated with them, which means that there is no way to access the applications from the network.
So we will have to create the Service and Route objects next:
psc expose dc myapp --port=8080 -n myapp-test
psc expose svc myapp -n myapp-test
psc expose dc myapp --port=8080 -n myapp-prod
psc expose svc myapp -n myapp-prod
|
In the pipeline definiton (the advanced-pipeline-buildconfig.yaml file from the Git repo),
we need to set the URL of our applications in the various environments. It is specified in the
You will have to change these hostnames to the ones that got assigned to your routes that you have just created, or the pipeline will not be able to access the application, and will fail at the test steps. |
To see what are the hostnames that got assigned to you, use the psc get routes command
to see the routes you have just created in the myapp-test and myapp-prod projects, like this:
~ psc get routes -n myapp-test
NAME      HOST/PORT                       PATH      SERVICES   PORT      TERMINATION
myapp     myapp-myapp-test.apps.pspc.ws             myapp      8080
~ psc get routes -n myapp-prod
NAME      HOST/PORT                       PATH      SERVICES   PORT      TERMINATION
myapp     myapp-myapp-prod.apps.pspc.ws             myapp      8080
So here we can see that the route in the myapp-test project has the hostname myapp-myapp-test.apps.pspc.ws.
Check what are the hostnames you get, and change the hostnames in the pipeline definition
using the command psc edit bc pipeline -n myapp-dev. (Note: sometimes the pipeline definition
appers mangled in the psc edit command. If you experience this, try using the web console to edit
the pipeline by selecting Builds → Pipelines and clicking on the Edit Pipeline link at the bottom).
Starting the pipeline
At this point your pipeline is ready to roll! You still have not started a build yet, so your application is not built and deployed, but everything is set up so all you have to do is to start the pipeline, lean back and watch how it does everything by itself.
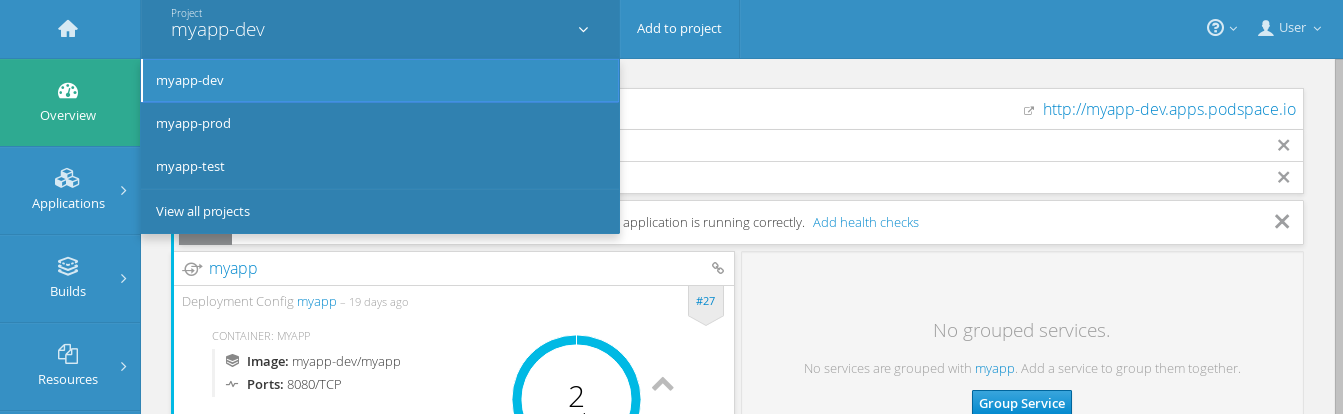
From now on we will be using the web console. Log in, and switch to the _myapp-dev devlopment project from the top dropdown list.
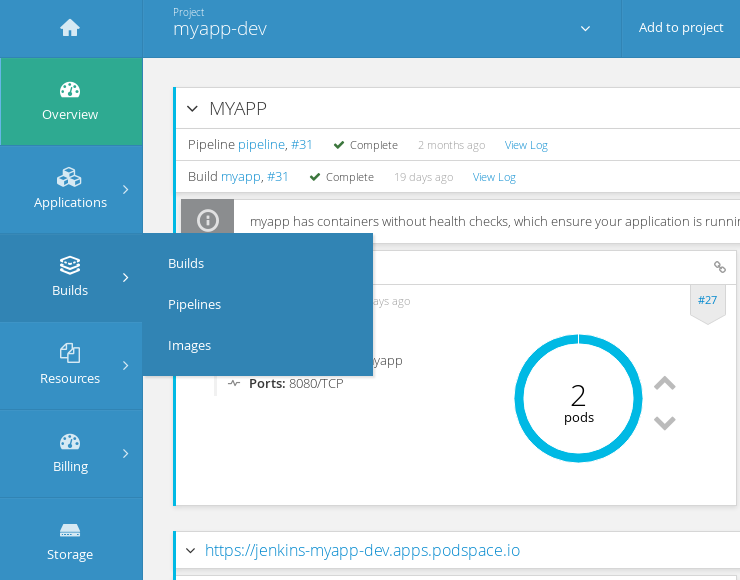
Open the Builds menu and click Pipelines.
Start the pipeline now by clicking on Start Pipeline.
The pipeline should complete all the way to deploying on production and look something like this.
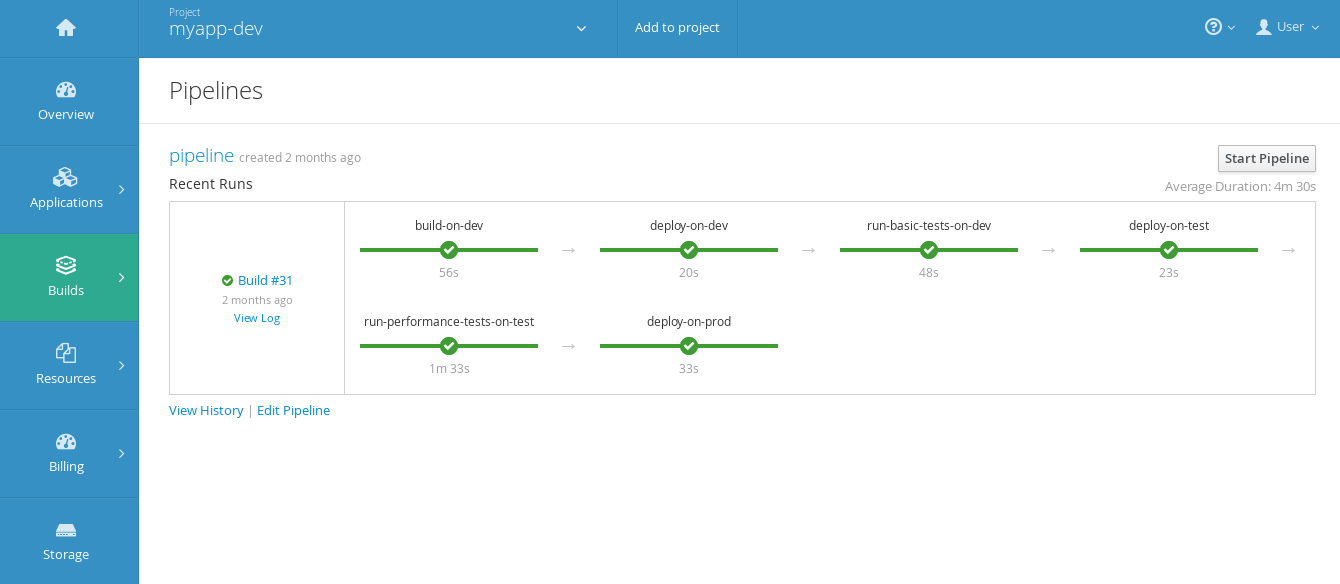
Pipeline steps explained
-
build-on-dev. A new version image of the Kitchensink application is created from the provided source code, in the development project, by using a WildFly base image.
-
deploy-on-dev. The created image is deployed in the development project.
-
run-basic-tests-on-dev. A JMeter test case check if the application is working properly in simple scenarios.
-
deploy-on-test. The image that was previously created in the development project, is deployed in the test environment.
-
run-performance-tests-on-test. Multiple JMeter based performance tests are simulating hundreds of users accessing the application simultaneously, each one making a couple of Register operations. This test verifies that each registration ends successfully, also measuring the duration that each registration took to complete.
-
deploy-on-prod. Once the application passed all tests, the same image from the development project is deployed in the production environment.
Testing the application
We have two test stages in our pipeline: run-basic-tests-on-dev and run-performance-tests-on-test. Both of these stages use JMeter to run the tests.
We will not go into the details of how to prepare a JMeter test case, but if you are curious, you can find the JMeter test files under the kitchensink/src/test/jmeter directory (you can open the JMX files with JMeter). You should also check out the pipeline definition in tutorial/advanced-pipeline-buildconfig.yaml for an example of how to run JMeter tests from the pipeline.
Functional tests
A continuous delivery pipeline is only as good as the tests that it executes. The main ideas is that the tests should catch all errors that might have been introduced in a build before the app gets deployed into production. Writing good tests is the most time-consuming task in putting together a delivery pipeline solution, no matter what platform and tools you use.
For the demonstration purposes, we have only implemented a couple of simple test cases in our testsuites. The first one, which runs in the run-basic-tests-on-dev stage, simply checks that the "Register" button is there on the index page of the application.
| If you want to test these changes yourself, you will have to modify the source code of the application on GitHub. In order to do this, you have to fork the pipeline-demo repository under your own account, and change the Git URL in the _myapp BuildConfig to use your repository. You can do this on the web console, by selecting myapp under Builds / Builds, and then click Actions / Edit. |
So let’s test it by removing the Register button from the front screen of the application. Edit line 53 from the index file, by replacing _h:commandButton with h:message and change the header (line 24) to Welcome to Wildfly! - Change v1: Broken Button, just to make the new version more easily recognizable.. Now that all the changes are made, let’s restart the pipeline.
It appears that the process failed at the basics tests step. But did this change affect all the versions? Let’s open the application in the development environment.
As we expected, the Registration button has disappeared. But, by going through the testing and production environments, we can conclude that the only affected version is in the development environment. Great, so we have seen that our pipeline has actually catched an error and stopped it propagating to the production environment.
Performance tests
Now let’s make it’s job harder! We will introduce a different kind of error which in turn will make the application slower.
The next test stage inside run-performance-tests-on-test executes the test defined in kitchensink-test.jmx. What it does is that it keeps registering new users continuously, over and over again. And in the meantime it measures how much time it took to complete every registration. If a registration process took more than 200ms to complete, it considers it as an error.
In the end, if more than 10 percent of the user registrations have failed (by taking too much time to complete), the test stage will be considered failed and the pipeline would stop.
Let’s edit one of the controllers of the application by introducing a call to a method which introduces extra time for the execution of the application when the user registrations are processed.
Uncomment line 60 from the controller file. Be sure to fix the _Register button issue by replacing h:message with h:commandButton in line 24 in the index file and change the header to something different, like _Welcome to WildFly! = Change v2: Slow
By restarting the pipeline we can see that the step at which the application fails is the performance test, thus the change is only visible in the testing and development environments, leaving the production one untouched.
Recovery
Now, let’s fix the last error we have made, by removing the method which slowed down the application (line 60, controller) and change the header to mark the clean version with something like _Welcome to Wildfly! - Change v3: Everything OK. (line 24, index file).
By restarting the pipeline, we can see that the application had successfully passed all the build, deploy and testing stages. This can be easily checked by seeing that the change occured in the development, testing and production environments.
Conclusion
We have seen how to set up a full blown continuous delivery solution using PodSpace. Since the pipeline is being executed by Jenkins, you have full control over what you do within the pipeline. Jenkins has a large ecosystem of plugins and is well integrated with many external tools available, so it should be easy to integrate PodSpace with other external providers too.
Note that even though the pipeline was completely automatic in this example, it is not mandatory to always be like this: you can also introduce manual approval steps in the pipeline (before it goes to production, for example). There are literally endless possibilities when it comes to design your own, custom, pipeline.