This tutorial covers the basic concepts of building application on PodSpace. Building in PodSpace generally means creating a Docker image out of something. That something which you create the Docker images from are called the build sources, and are usually kept in a Git repository (but you can also start a build from sources that are on your local computer).
The build sources can be one of the two following types:
-
Dockerfile: Which is the standard build method used by Docker to build images. In this case, the Git repository containing the sources has to contain a file named
Dockerfile, and optionally may contain a number of other files and directories that will be used throughout the build process. For more information about Dockerfile based builds, refer to the official Dockerfile reference. -
Application source code: In this case, the sources of the build consist of an actual application source code, written in any language. PodSpace uses an extensible build system called S2I which makes it possible for us to support basically any programming language that you can think of. Out of the box you can build JavaScript (Node.js), PHP, Python (Django), Ruby (Rails), Java and Perl applications, but S2I makes it possible to create your own builder image to support programming languages and runtime that are not readily available.
Build Configurations
The first thing that you must have in order to build an application is a build configuration. For this, you must create a BuildConfig object which tells PodSpace what kind of a build you want to have and where are the sources, and an ImageStream object which simply represents a Docker repository inside the PodSpace Docker registry.
A build configuration has to specify a minimum of three things:
-
The source: Which is basically a pointer to a Git repository that contains the sources.
-
The build strategy: This just specifies whether this build is a Dockerfile-based build, or an S2I build (see above).
-
The output: A reference to an ImageStream where the newly Docker images will be pushed to.
And of course there are a lot more advanced features to play with. If you are interested in all the details, check out the Builds section of the OpenShift manual.
But generally you don’t even have to create the BuildConfig and the ImageStream by yourself,
because both the web console and the psc command provide means to create these automatically
for you.
Building an application
Let’s take a look at using the web console to build and deploy an application from source.
For this, we will use the S2I (source to image) build strategy to build a CakePHP application. As mentioned earlier, S2I implies a builder image. For now, we will use one from the PodSpace catalog. Let’s get started!
-
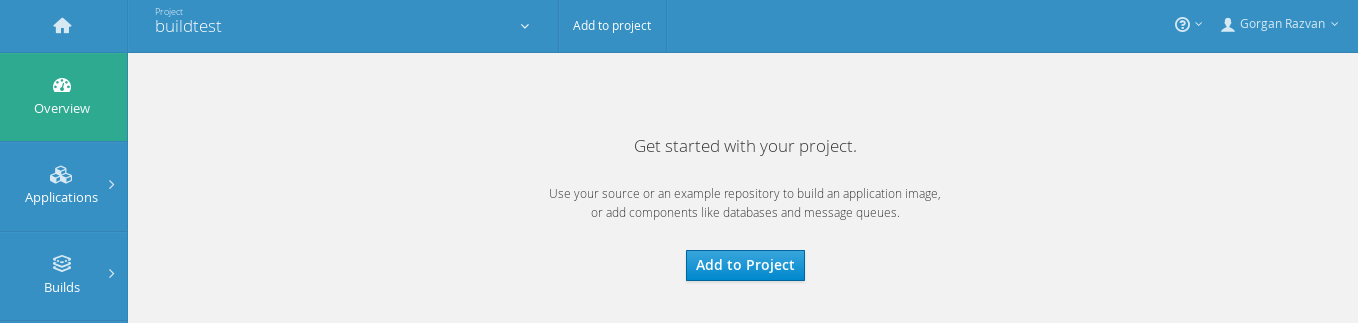
To Access the PodSpace catalog click Add to project in the center of the window or in middle of the top navigation bar of the web console overview.
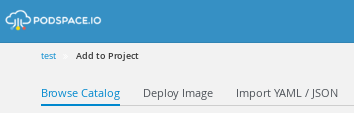
Click Browse Catalog in the horizontal upper menu.
Type cakephp-mysql-example in the search box and click the resulted box.
-
You will get a form, asking to define few values. They are actually template parameter values.
A template? Now, setting up our application environment is all handled by this template. A pretty smart one since it builds our CakePHP image, deploys it along with another Pod containing MySQL for the database. Moreover, it automatically generates the environment variables that link the Pods of CakePHP and MySQL. A lot of problems solved in a single click, right?
What about the actual source? We’ve prepared one too. PodSpace has few simple quickstart application sources on its GitHub page. CakePHP-example is the one we will use for now which obviously uses the PHP programming language.
First, let’s type in the Git Repository URL text field the application git source link.

As you can see there are many other text fields in the form but, basically, the steps done so far are enough to build and deploy this application. The other fields are completed automatically if not filled (including the hostname by which the application is exposed).
-
Unleash the power of PodSpace by clicking Create at the base of the form. Give PodSpace at least one minute.
Overview of the environment
PodSpace has a lot to do while building and deploying from this catalog template. The template we used creates the following objects:
-
A BuildConfig.
-
One DeploymentConfig named mysql which deploys the Pod running the MySQL database engine
-
One DeploymentConfig named CakePHP which deploys the Pod running the actual CakePHP application
-
Two Services, each one acting as an internal load balancer. One for the mysql Pod and the other for the CakePHP one
-
A Route for the CakePHP Service to make our application reachable from the Internet
And all this, only with a Template. Templates are really powerful and useful tools. More about them here.
Monitoring the Build progress
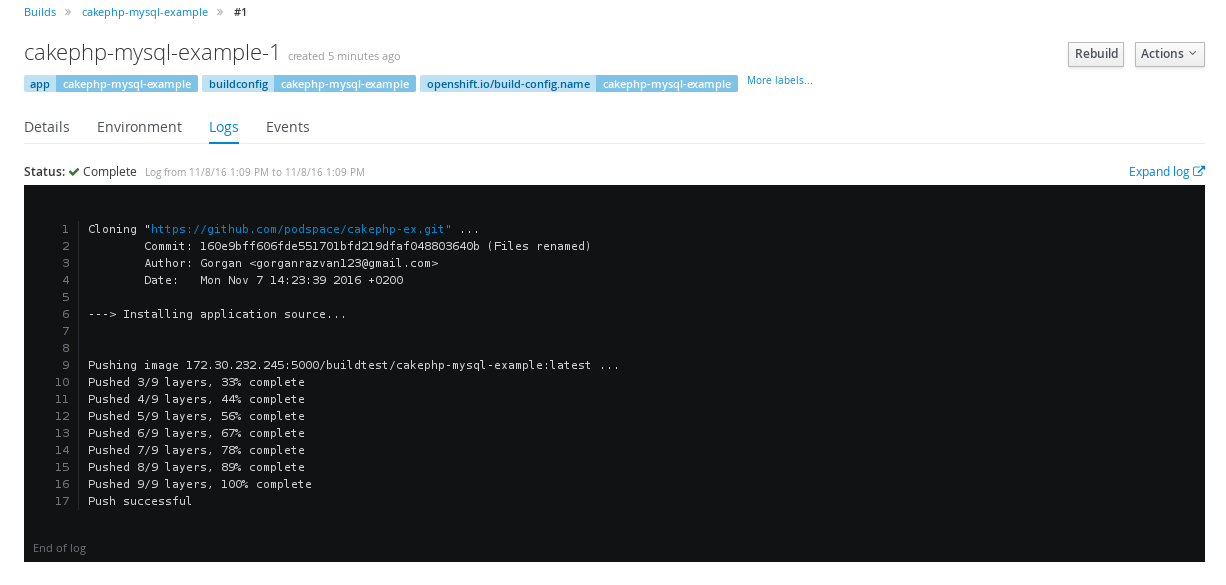
The build progress can be tracked by going in the left navigation bar to Builds→Builds. Click on the build you are interested in.

Now, click View Log to see the Log messages of the build process. If the example build was successfull, the Logs should look like this.
Publishing the application
In PodSpace, Services are exposed to the Web by creating Routes. In this case, the template we have used creates one automatically. You can find it by going to the Routes panel in the left navigation bar to Applications→Routes. First, be sure that you waited enough for PodSpace to deploy all the Pods, otherwise there is a chance your Route was not created yet. If it is ready, you should see a Hostname link for the cakephp-mysql-example Service.

Click on the Hostname link and you should get something like this.

Dockerfile based builds
Along the S2I build there is another widely used strategy, called Docker build strategy.
Basically, it invokes the plain docker build command, expecting a Dockerfile and all the
artifacts it requires.
A Dockerfile is a text file containing instructions which are executed by Docker to build a new image. Inside Dockerfiles, a specific format and set of instructions is used. You may learn the basics here.
|
What is a Dockerfile? A Dockerfile is a text file containing instructions which Docker executes to build a new image. There is a specific format and set of instructions. You may learn the basics here. Any image made from Dockerfile instructions has at its core a base image (usually a Linux distribution) and a child image (the actual application). |
Using the command line
Before we finish, let’s take a quick glampse on how to use the psc command line client to
create build configurations:
-
Create a build from a Git repository:
$ psc new-build <git repository url>
This command will auto-detect the source code within the specified Git repository and create a BuildConfig and ImageStream based on what it finds.
-
Create a build from a Git repository, specifying a base image:
$ psc new-build <git repository url> --docker-image=myproject/baseimage
-
Create an S2I build from a Git repository, specifying the builder image:
$ psc new-build podspace/nodejs-010-centos7~https://github.com/podspace/nodejs-ex.git
Use this in case
psccouldn’t automatically detect the programming language based on the contents of the repository.
After you have created your BuildConfig (which you can verify by looking at the output of
psc get bc, you can start a build with the psc start-build command like this:
-
Start a build by choosing a BuildConfig
[user ~]$ psc start-build <buildConfig_name>
You can add the --follow parameter to psc start-build to keep showing the logs of the build
until it completes.
Conclusion
You have learned the basic concepts of builds in PodSpace and have practiced how to use the S2I method. You know a lot now, feel free to experiment with your applications too.